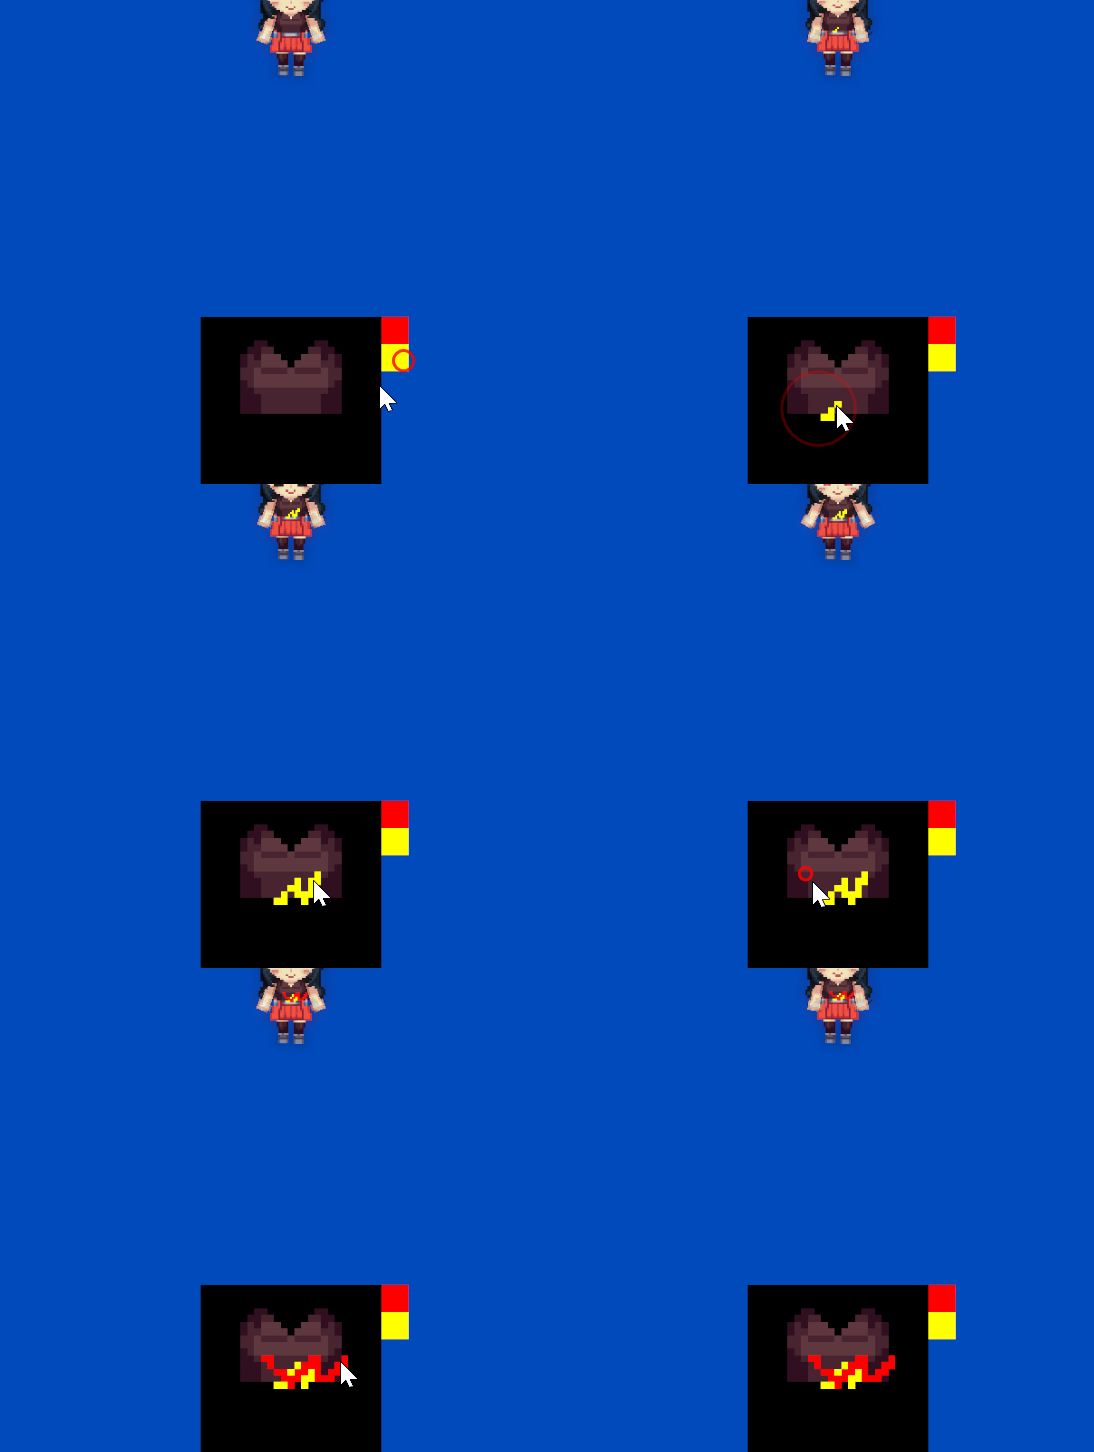
스파인 텍스쳐에 낙서하기.

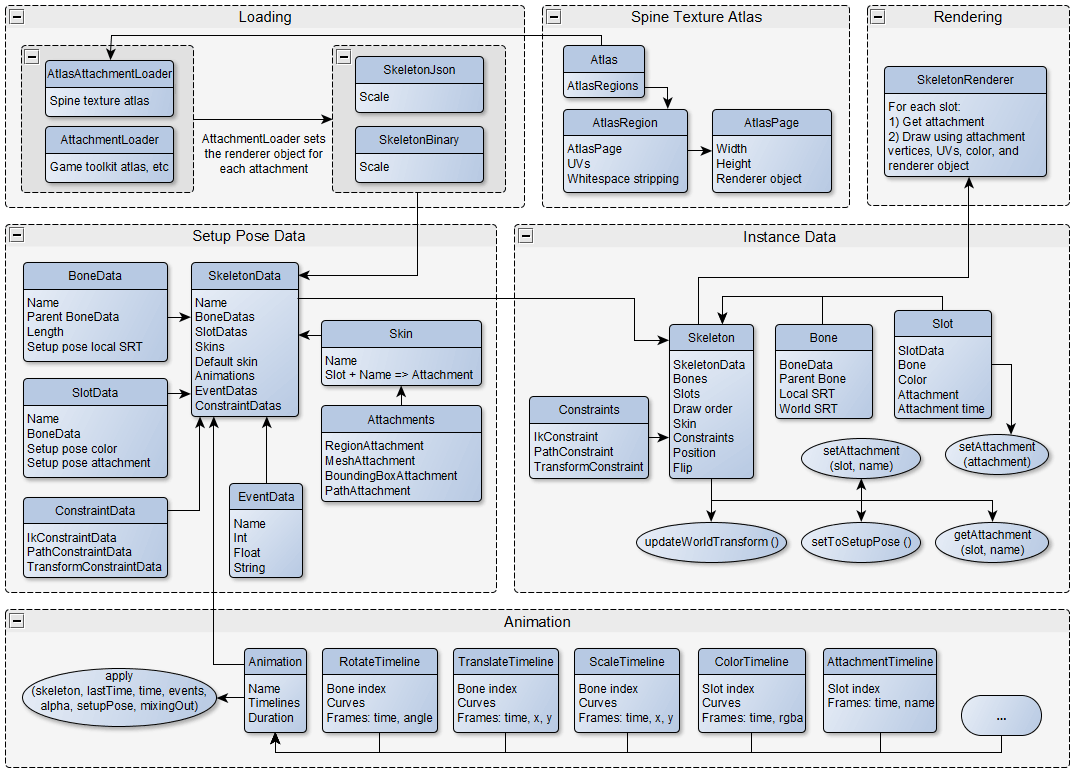
스파인 API 구조를 보면 뭐 대략 이렇게 돼 있는데
이번에 중요한 부분은 가운데쯤 있는 Skin과 Attachments이다.
그 중에 어태치먼트가 스킨의 실제 텍스쳐 정도의 역할을 하는 것으로 보이는데
그 텍스쳐를 제어해서 스파인에 런타임으로 텍스쳐를 수정하는 것이 목표.
=동물의 숲에서 옷에 직접 도트질하기 Spine 버전.

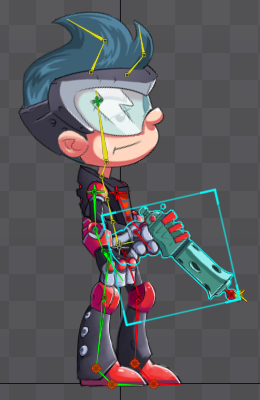
예시에서 테두리 쳐진 부분 것이 Attachment이고
그것의 텍스쳐에서 필요한 부분만 복사해서 새로운 텍스쳐를 하나 만들어내고
새 텍스쳐를 수정해서 꾸민다음 저 Attachment에 끼우겠다는 심보.
Attachment가 약간 포토샵의 레이어 같은 느낌?
Skin은 레이어 모아둔 폴더 느낌?
public Texture2D GetTextureFormSlotAttachment(Slot slot) {
Texture originalTex = slot.Attachment.GetMaterial().mainTexture;
MeshAttachment _att = slot.Attachment as MeshAttachment;
TextureRegion attTexRegion = _att.Region;
AtlasRegion attAtlasRegion = attTexRegion as AtlasRegion;
Debug.Log(string.Format("u: {0}, u2: {1}, v: {2}, v2: {3}", attTexRegion.u, attTexRegion.u2, attTexRegion.v, attTexRegion.v2));
Debug.Log(string.Format("w: {0}, h: {1}, OW: {2}, OH: {3}", attTexRegion.width, attTexRegion.height, attTexRegion.OriginalWidth, attTexRegion.OriginalHeight));
Debug.Log(string.Format("{0}, {1}, {2}, {3}", originalTex.width * attTexRegion.u, originalTex.width * attTexRegion.u2, originalTex.height * attTexRegion.v, originalTex.height * attTexRegion.v2));
Texture2D newTex = new Texture2D(attTexRegion.width, attTexRegion.height, TextureFormat.RGBA32, false);
Graphics.CopyTexture(originalTex, 0, 0, (int)(originalTex.width * attTexRegion.u), (int)(originalTex.height * attTexRegion.v2), attTexRegion.width, attTexRegion.height,
newTex, 0, 0, 0, 0);
if (attAtlasRegion.degrees != 0) {
Color32[] originalPixels;
Color32[] rotatedPixels;
int w = newTex.width;
int h = newTex.height;
int iRotated, iOriginal;
switch (attAtlasRegion.degrees) {
case 90:
originalPixels = newTex.GetPixels32();
rotatedPixels = new Color32[originalPixels.Length];
for (int j = 0; j < h; ++j) {
for (int i = 0; i < w; ++i) {
iRotated = (i + 1) * h - j - 1;
iOriginal = originalPixels.Length - 1 - (j * w + i);
rotatedPixels[iRotated] = originalPixels[iOriginal];
}
}
newTex = new Texture2D(h, w);
newTex.SetPixels32(rotatedPixels);
newTex.Apply();
break;
case 180:
originalPixels = newTex.GetPixels32();
System.Array.Reverse(originalPixels, 0, originalPixels.Length);
newTex.SetPixels32(originalPixels);
newTex.Apply();
break;
case 270:
originalPixels = newTex.GetPixels32();
rotatedPixels = new Color32[originalPixels.Length];
for (int j = 0; j < h; ++j) {
for (int i = 0; i < w; ++i) {
iRotated = (i + 1) * h - j - 1;
iOriginal = j * w + i;
rotatedPixels[iRotated] = originalPixels[iOriginal];
}
}
newTex = new Texture2D(h, w);
newTex.SetPixels32(rotatedPixels);
newTex.Apply();
break;
default:
break;
}
}
newTex.filterMode = FilterMode.Point;
SpineSlotPainter.instance.SetImage(newTex); //이건 UI 스크립트에 텍스쳐 등록하고 표시하는 기능
return newTex;
}
여기까지가 Slot에서 현재 텍스쳐를 복사해서 Texture2D로 반환하는 함수이다.
slot에 Attachment의 Material가 쓰는 mainTexture를 가져오고, (=여러 부위가 섞인 통짜 텍스쳐[Atlas]임)
거기서 TextureRegion, AtlasRegion을 어찌어찌 다뤄서 Atlas 안에 실제로 사용하는 부분만 잘라낸 후
회전이 들어갔다면 정방향으로 다시 텍스쳐를 회전시키기까지 한 뒤 Texture2D로 보낸다.
public Material CreateMeshAttachmentByTexture(Slot slot, Texture2D texture, int slotIndex) {
if (slot == null) return null;
MeshAttachment oldAtt = slot.Attachment as MeshAttachment;
if (oldAtt == null || texture == null) return null;
MeshAttachment att = new MeshAttachment(oldAtt.Name);
att.Region = CreateRegion(texture);
att.Path = oldAtt.Path;
att.Bones = oldAtt.Bones;
att.Edges = oldAtt.Edges;
att.Triangles = oldAtt.Triangles;
att.Vertices = oldAtt.Vertices;
att.WorldVerticesLength = oldAtt.WorldVerticesLength;
att.HullLength = oldAtt.HullLength;
//att.RegionRotate = false;
att.Region.u = 0f;
att.Region.v = 1f;
att.Region.u2 = 1f;
att.Region.v2 = 0f;
att.RegionUVs = oldAtt.RegionUVs;
att.UpdateRegion();
Material mat = new Material(Shader.Find("Sprites/Default")); //여기서 Material 적절히 바꿔줘야함
mat.mainTexture = texture;
(att.Region as AtlasRegion).page.rendererObject = mat;
slot.Attachment = att;
}
이제 스파인의 해당 Slot에 위에서 추출했던 Texture2D를 끼워주면 되는데
위의 API 구조에 보이는 attachment 중에서 MeshAttachment를 새로 만들어서,
그것을 원래 Slot의 attachment 자리에 끼워주면 된다.
(대충 슬롯의 텍스쳐를 바꿔치기 한다는 뜻)
단, Spine Material을 사용하지 않으므로 적절한 매터리얼을 끼워줘야
빛이나 그림자가 다른 부위와 이질감 있게 동작하지 않을 것이다.
이제 Texture2D에 SetPixel을 하던 어떻게든 해서 변화를 주면 스파인에 즉시 반영된다.
투명색 칠하기도 된다.
해달라해서 해봤는데 생각보단 쉽게됨.


